Saturday, January 7, 2012

The Scrapbook Room...


Today is THE DAY that I get my scrapbook desk all tidied up and organized. I have let my scrapbooking fall by the wayside, as super couponing took over.

Now, I have enjoyed learning how to save huge amounts of money, start a Facebook page to talk about it, begin teaching classes to teach others and then starting a full blown website. But, now I have to get back to finding an outlet for being creative... I keep seeing these clever craft projects and cute scrapbooking ideas and wishing..... And even buying the occasional pc. of paper or cute embellishment... So, today is the day!

I am getting my desk all cleaned off. My papers organized. My ribbon stash tidied. And all my bits and pcs. sorted. My hubby has to work today, so I have the whole day to devote (along with my 3 year old's needs)....
I do have an agenda, as my Mom is coming over on Monday morning for an ALL DAY crop! I have to be able to find my stuff. Get some pages prepped. And maybe even start one today...
Hey! I can dream, can't I???

OK, I have to sign off or I won't get started.....

Friday, March 5, 2010

17 & 18

I like these pages! I loved taking the pictures of my darling daughter that day (November 2008) and then to find the perfect paper...


Used some $1 package of crocheted flowers I found at Michael's waaaay back. Never had the right color or theme to use them. They definitely worked today! I used a strip of light blue ribbon, which matched the blues in the paper, but yet I wasn't using that shade of blue anywhere else. I went with the limey green and dark blue.


Inked the edges of my text. Added the last 2 flowers from the pkg. (why would I want to leave them? Might NEVER find a use for them!!) I was looking thru my stash of baby stuff searching for the embellishments for these pages, and came across a page of vellum words/titles. The green color of the "Beginner's Luck" caught my eye...


But, then my brain took over and I grabbed a scrap of paper from the bin and went to scribbling! This perfect little human was NOT Luck! She came from our Divine Creator's perfect plan and timing! I added the "I am fearfully and wonderfully made" verse from Psalms and found it complete! Love it!!!

15 & 16


These 2 half pages are actually the front and back of a 6 inch page that will be added . I have the 6 inch page protectors that have an adhesive strip and you can attach them to any page. I needed some extra space and this was one way of doing it, but yet keeping it to a "2" page spread. You will see 2 more at the end. It will have a half page that flips open on the left page and one on the right.


Again I used the blocking technique, in order to fit a lot of full sized photos on my pages. I am not a scrapbooker who typically uses 1 or even 2 photos per page. I like my pictures and want them on there!

13 & 14


Pics. from our 2008 Fall party (Nov. 1):
This style of page is called "blocking". When you have alot of photos to get on a spread, like I do, you trim where needed and try to fit as many in as possible. Keeping straight lines and edges to keep them somewhat unified. I had some empty spots here and there and used scraps of paper to fill in those empty holes. Also added some extra color to my pages. Used an old pumpkin border on the bottom, as well. Border stickers used to be all the rage!! A long time ago! Finally found a page for them!!!

11 & 12


Glittery cardstock from the stash. Metal charms purchased on clearance on a vacation ages ago... Finally have reason to use them!

9 & 10


Used some metal charms and brads, some inking on the edges and some rough jute-looking trim. I added some embroidery floss knots to the buttons for a finished look. (You will see a close up of them)

I ended up printing my journaling on vellum and when attached, the glue dots showed thru. So,I used tiny adhesive rhinestones to cover the spots.

7 & 8


I just thought I'd try something different here. I cut 2 pcs. of paper so that I could inset a square of each into the remaining L shape. I used a thin strip of 2 shades of pink coordinating cardstock to cover the seam.

5 & 6


Vellum to make the bubbles, then inked the edges with blue ink to help them stand out better. Used the wave stencil to cut my paper. Used 1 sheet of ducky paper and 2 of dotted swiss type print to make the backgrounds My Cricut was the vice used for the ducks and the bubbles.

This is one of a few times that Mommy is giving the bath and even rarer still is the fact that I get to be in the pictures!!

3 & 4


Used cardstock and ribbon to make the pocket page on the right. I used regular tape runner under the edges, but then reinforced the corners with glue dots. (you could also use your sewing machine on a project like this to reinforce the seam/edges)I like to keep some of our cards each Christmas, from special people or because it was a special card. This is a way to keep them w/o having to actually display them. The left or first page has the photos or photo cards that came from friends and family.

1 & 2

Here are my first 2 pages done for 2010. Nothing major, but the first of the year...


I used some acrylic word blocks that were bought quite a few years ago on clearance. never had the opportunity or right color scheme to use them before today. Still using up old stuff!!
I used some lavender/purple rick rack, as well on the left page. Adds some texture, without standing out too much.

Thursday, February 18, 2010

Pages 243 & 244

Here are the final 2 pages from 2009. I did not make it to my goal of 365 pages completed! I hit a dull place, followed by lack of funds for photo printing, followed by a super adventure into extreme couponing! Now that consumes a large portion of my spare time! I have had to schedule in time to make sure I get some scrapbooking done these days!

Haven't decided just what goal to have for scrapbooking this year... While I did not make it to my actual goal, I did complete a whole lot of pages!!! 244 pages is a LOT of work! How many do you think you did this past year?


Some puffy bear stickers, green rub on letters for the title.

Pages 241 & 242

Nothing like adding 11/2009 pages in 2/2010!! Oops!


Used some rough, fibrous trim from Mom, some buttons and rubbed the edges with ink. Again, took these before the text was typed and added.

Pages 239 & 240


Ok, posted in Feb, but completed in November 2009.
Used some glittery cardstock that I have had for ages, as well as some metal flower tags. This is of Emma playing in her new exersaucer and loving it!

I still need to type and add the journaling.

Wednesday, October 14, 2009

Mark Twain

DID YOU KNOW?

Mark Twain was a scrapbooking enthusiast who dedicated his Sundays to his hobby. He also held patents for his self-pasting scrapbooks that could be dampened with water. Twain created 57 different types of self-pasting scrapbooks.

Source: EK Success Scrapbooking Fact Sheet

Monday, September 21, 2009

Mid-month Page Update

January -31 days
February -28 days
March - 31 days
April -30 days
May -31 days
June -30 days
July -31 days
August -31 days
Sept. -30 days
_____________
= 273 days.

Uhmmm... I have only 238 pages posted... I'm thinking I better get a move one!!! I have been ahead every month until we got to August and my energy dragged, we were really busy and I had no extra money for photo printing. Let's see what I can do about this page # lacking business...

Pages 237 & 238

Lunch date with Nana.


I used something called an "Over All" as the decor on these pages. Purchased quite a few years ago, it is the title, sayings, die cuts, etc... all printed on one heavy piece of 6 x 12 glossy carstock. Then, you have to cut it apart in whatever way suits you best. I chose to cut around it all and make it look less like a straight edged, boring strip. Using up some of that old stash of mine!! Love it! Inked the edges of the pages with black also.
The Lady Bug title worked, as Emma had on a Lovebug outfit. :)

Pages 235 & 236

I just LOVE the picture of her with her leg in the air and her diaper showing!!
The left picture is raised with pop dots. The title is a rub on.


My first time scrapbooking an 8 x 10 picture. I struggled with the choice of background paper, as I didn't want it competing with the picture itself. Then, it took forever trying to pull it all together so that the other papers and embellies didn't compete with the rainbow. With Steph's help, I finally got it done. Placed the text over the photo to hide the car in the picture!!

Bought the gem flowers at Target's 1 spot.

Pages 233 & 234

Sundays in November 2008:


Used ribbon, felt flowers, black brads, red rhinestones. Haven't added the journaling box in this picture, but I printed it out in dark red ink. The second page with Emma in the red print dress, I can't decide if it needs something else or not... Maybe a flower buy the left pic or something... ???

Pages 231 & 232


These are from 2004 also. My Bridesmaid's Luncheon.


The fall papers are from a Fall paper pack. The leaves are glossy die cuts. The bit of sparkle are rhinestone dots and rhinestone type leaves.

Pages 229 & 230

These are from Hurricane Jeanne in 2004.

We had Hurricane Francis a month before this, and I did quite a few pages about that storm, so I chose to condense it down and only do a 2 page spread. This meant that in order to use my fave pics I had to "block" the page and fill it in with pictures. Doesn't really leave any space to be creative but it shows my pictures which is THE purpose of this craft.

Check out Martin at work the 2nd day after the storm!! Working so hard, right???


I had one photo too many for this set of pages, so I typed my journaling in a 4x 6 size to match the picture and matted black paper in between, leaving about 3/4 of an inch above in order to punch the hole and add ribbon/fibers. I will just slip down bhind the page and if the person looking wants to read it, they pull it out. You can add a paper pocket to the back of the page to hold the journal/photo, which keeps it from ever falling down to far into the page protector, but it also makes it more difficult for the looker to get it back into the page/pocket without damaging any of it.

Monday, September 14, 2009

Pages 227 & 228


I love these pics. My santa hat and the panties from her Christmas Day outfit. They say "Santa Baby" on the butt/bum.

I used chipboard letter for the title. Painted them and then added a fine glitter around the edges. Used the Cricut for part of the title, as well. Added some ribbon, a few rhinestones for bling bling and tah dah! all done.

Thursday, August 13, 2009

Pages 225 & 226

The photo on the lower left is a flip album, that actually houses 5 pictures, not just the one you can see. That is what the loops of fiber are for, to lift each page.


Found the dimensional New Year's stuff at Target last year. Bought a set for me and my sister.

I haven't used a paper punch in years either and today was the day. My right hand page needed some swirls to fill in empty space and to coordinate with the facing page a bit better. My Cricut carts didn't have one, so I pulled out the dusty case of punches and TAH! DAH! I had a swirl! Just what I needed! So, once again, trying to use more of my scrapbook stash was accomplished! Gotta love it!

Pages 223 & 224

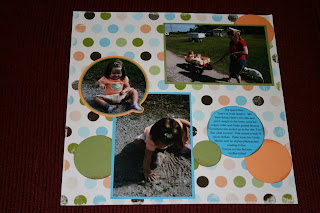
I haven't used my circle cutter in years!!! Literally! My husband was wondering what in the world was I doing, when I got it out! Anyway, the circles on the background papers led me to add other larger circles, as well as to find a photo that could be cut out in a circle.

I placed my sticker title (Happy New Year's) on a triple layered half-circle. I just wish I had placed it first on the peach color rather than the blue. You can't see the silver writing very well on the blue.

I even figured out how to print my text in a circle!!! Am I cool or what?? Hee Hee! I did ink the edges of the circles. I like how it turned out and ow quickly it came together!

Pages 221 & 222


Steph, these are the ones I was trying to tell you about.

I cut out pcs of flowers that were left on the scraps and used them around the page, as needed.